
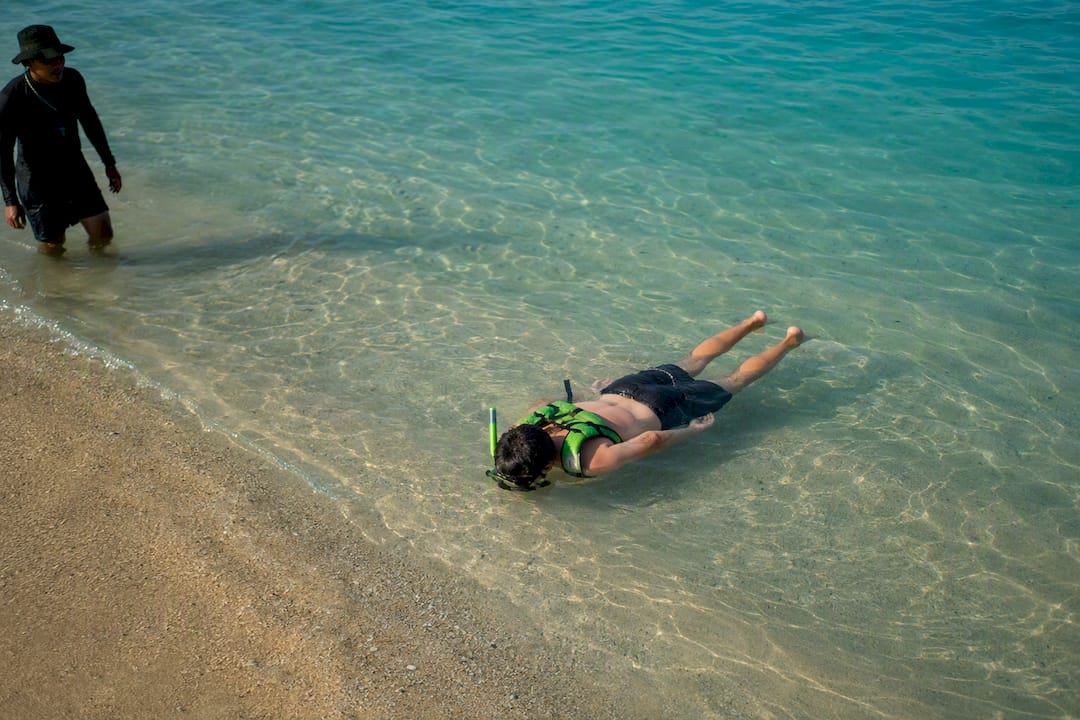
Non-Swimmers: Edge Snorkeling Safely After 2–3 Short Sessions
Yes, non-swimmers can snorkel, but only with three things in place: calm shallow water, proper flotation, and a trained guide watching closely. Skip any one of those, and the risk climbs fast, especially if there’s current, solo swimming, or a heart or breathing condition involved. Start with Qbictravel’s guided sessions or our Coral Island snorkelling guide to see what a properly supervised first attempt actually looks like.
TL;DR:
- Confidence-building shallow-water practice, like breathing drills and float exercises, prepares non-swimmers to handle real snorkeling situations more safely.
- Close supervision by a guide and a low guide-to-guest ratio significantly reduce the risk of panic and help manage emergencies effectively.
- Proper gear, especially a well-fitting snorkel vest and a traditional mask, is crucial for maintaining buoyancy and ensuring comfort during the experience.
- Snorkeling should be avoided in conditions with strong currents, high waves, poor visibility, or when alone without supervision.
- The core technique for non-swimmers is staying in shallow, stand-up water, using minimal movement and gentle kicks to stay in control and avoid exhaustion.
Table of Contents
- Can non-swimmers do snorkelling? The safety trade-offs and who should not go
- Essential gear for non-swimmers: what to rent or buy and how to fit it
- Choosing a safe location and operator: what to ask before you book
- Step-by-step preparation and practice drills
- In-water safety techniques and the stop-reset-exit routine
- What to expect on your first session: pacing and pitfalls
- Mental preparation and overcoming fear of water for non-swimmers
- Adapting snorkelling techniques for those without swimming skills
- Emergency procedures tailored to non-swimmers in snorkelling scenarios
- What we’d tell a nervous first-timer
- Booking a supervised snorkelling trip with a local operator
- Sources
Can non-swimmers do snorkelling? The safety trade-offs and who should not go
Panic, not water, is the real hazard for non-swimmers. When someone who can’t swim suddenly can’t see the bottom, the instinct is to thrash upright, which pulls the head underwater and triggers exactly the response you’re trying to avoid. This is why buoyancy control matters more than swimming ability. If you can float face down with a snorkel vest and simply stand up the moment you feel uneasy, you’ve removed the one thing that turns discomfort into an emergency. Guides call this the “stand-up guarantee”: you never go anywhere you can’t plant your feet and breathe normally.
That said, snorkelling isn’t right for every non-swimmer, every day. Skip it, or reschedule, when:
- Currents, waves, or poor visibility are present, even if the water looks calm from the beach
- You’d be going alone, without a guide or buddy watching you directly
- You have a heart condition, uncontrolled asthma, or a fear of water severe enough to cause hyperventilation
- The site has no shallow, stand-up option near the entry point
If none of that applies, a pool session or a few swimming lessons beforehand will make the real thing far less daunting.
Essential gear for non-swimmers: what to rent or buy and how to fit it
Your equipment does most of the safety work here, so get it right before you get wet. A snorkel vest beats a standard life jacket for most non-swimmers because it keeps you gently buoyant while lying face down, which is exactly the position you’ll be in most of the time. A bulky life jacket tends to push your head up and back, making it harder to keep your face in the water and actually see anything.
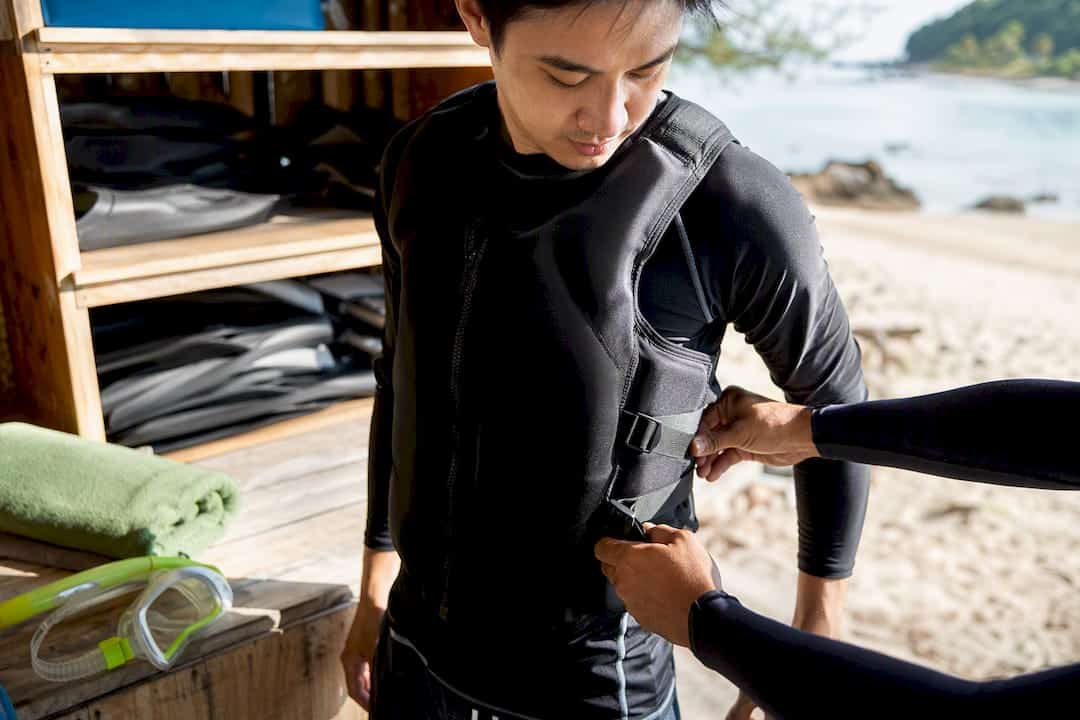
Masks split into two camps. A traditional mask paired with a snorkel gives you full control and is the safer default for beginners. Full-face masks feel comfortable and let you breathe through your nose, but they’ve been linked to carbon dioxide build-up in some designs and are strictly a surface-only tool, never for anyone still building water confidence.
Before entering the water, check:
- Mask seal: press it to your face without the strap; it should suction on its own
- Snorkel bite: the mouthpiece shouldn’t need clenching to stay put
- Vest fit: snug enough that it won’t ride up over your head in water
Pro Tip: Wear a rash guard or thin wetsuit top even in warm water. It stops sunburn on your back, which is the one part of you facing the sun for the entire session.
Choosing a safe location and operator: what to ask before you book
Site selection matters as much as gear. Look for a shallow shore entry, a calm bay sheltered from swell, clear visibility, and ideally a lifeguard on duty. Coral Island is a good example of the kind of shallow, protected bay that suits first-timers, which is why it’s worth reading a proper Coral Island snorkelling guide before you commit to a spot.
A good operator reduces risk further, since close supervision on guided trips correlates with far fewer incidents than unsupervised outings. Before booking, ask:
- What’s the guide-to-guest ratio, and will someone stay within arm’s reach of non-swimmers?
- What rescue equipment do guides carry, and is there a briefing on land first?
- How many people are in the group, and is there a clear, agreed exit signal?
- What happens if I want to stop halfway through?
A typical beginner-friendly guided session runs a few hours including transport, briefing, and gear, usually priced as a package rather than by the hour. Ask for specifics rather than assuming any two operators offer the same thing.
Step-by-step preparation and practice drills
Building confidence before you reach open water cuts panic risk dramatically. Work through this progression:
- Dry-land breathing: put the snorkel in your mouth on the beach and practise breathing through it slowly, without water anywhere near your face.
- Mask acclimation: splash water on your face wearing the mask, then dunk just your face in a shallow pool or the shoreline, breathing through the snorkel the whole time.
- Face-down float: in water no deeper than your waist, lie face down and float, using the vest for support, then lift your head to breathe normally.
- Clear and purge: practise blowing water out of the snorkel tube so a splash doesn’t panic you later.
- Stand-up and exit drill: from the float position, plant your feet, stand, and walk out, repeatedly, until it’s automatic.
Repeat each stage in short bursts of a few minutes rather than one long attempt. Progressive shallow-water practice like this builds confidence faster than jumping straight into open water. Most beginners feel ready for a guided outing after two or three short pool or shallow-beach sessions.
Pro Tip: Practise the exit drill until it’s boring. Boring means it’s become reflex, and reflex is what saves you when you’re startled by a fish, a wave, or your own imagination.
In-water safety techniques and the stop-reset-exit routine
When something feels wrong in the water, the fix is always the same sequence: stop moving, remove the snorkel or roll onto your back, breathe slowly, then either stand up or signal your guide. If discomfort doesn’t pass within a breath or two, exit. Rehearsing this drill on land and in shallow water cuts your reaction time when a real moment of alarm hits, according to guidance on snorkelling safely as a non-swimmer.
A few habits keep the whole session lower-risk:
- Stay close enough to your buddy or guide to touch, not just see
- Agree simple hand signals beforehand: thumbs up for “I’m fine,” a flat palm for “stop,” and a wave for “help”
- Use small, gentle fin kicks rather than big strokes; minimal exertion keeps your heart rate down and your breathing steady
Pro Tip: If you drift further than expected, don’t fight the water. Turn onto your back, float, and signal. Fighting a current burns energy you need for staying calm.
What to expect on your first session: pacing and pitfalls
Most beginner sessions run for a short period in the water, split into shorter bursts with rest breaks rather than one continuous swim. Shorter sessions are deliberately safer because fatigue is what turns a minor wobble into a real problem.
Expect gear, a briefing, and close guidance to be included, priced as part of a package rather than itemised separately. Watch for these common pitfalls:
- Drifting further from shore than you realise while watching fish
- Resisting the urge to exit because you feel you should push through
- Reaching or twisting for a photo, which is a frequent cause of losing composure underwater
Comfort always beats finishing the swim. No guide worth booking will judge you for cutting a session short.
Mental preparation and overcoming fear of water for non-swimmers
Fear of water is rarely about the water itself. It’s usually about losing control, and that’s a mental problem with a mental fix, not just a gear problem. Before you even get near the sea, sit with the mask on dry land and breathe through the snorkel while watching television or chatting with someone. The goal is to make the equipment feel ordinary before it ever touches saltwater.
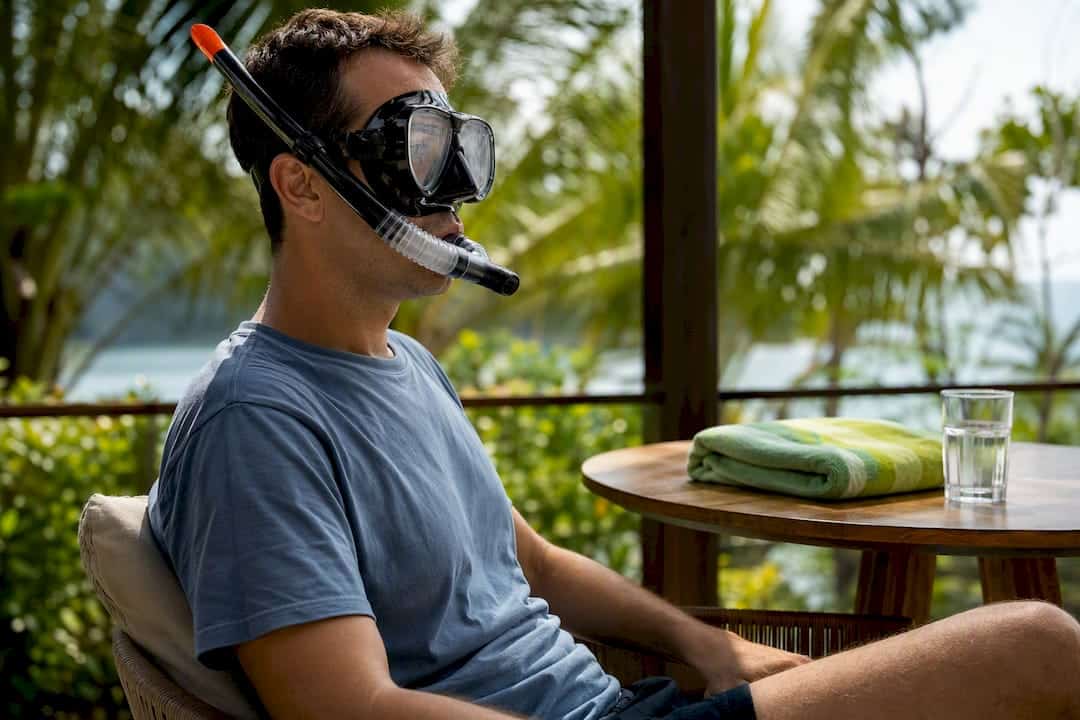
Visualisation helps more than most people expect. Picture yourself floating, breathing steadily, and standing up whenever you choose, because that mental rehearsal genuinely reduces the shock of doing it for real. Anxiety tends to spike hardest in the first thirty seconds of face-down floating, so knowing that in advance takes some of the sting out of it. It passes.
Breathing control is your main tool once you’re in the water. Slow, deliberate breaths through the snorkel, in for a count of four, out for a count of four, keep your nervous system from tipping into panic mode. If you notice your breathing speeding up, that’s your cue to stop, not push on.
Tell your guide about your fear before you start. A good guide adjusts pacing, stays closer, and checks in more often for anyone who mentions anxiety upfront, and guided supervision genuinely reduces panic by watching body language and adjusting the group’s pace. Hiding your nerves helps nobody, least of all you.
Give yourself permission to fail the first attempt. Plenty of confident snorkellers needed two or three tries before the face-down float stopped feeling alarming.
Adapting snorkelling techniques for those without swimming skills
Swimmers snorkel by covering distance. Non-swimmers snorkel by staying put, and that single shift in approach is what makes the sport genuinely accessible without ever needing to learn a stroke.
The core technique is called edge snorkelling: you stay in water shallow enough to stand, moving only a few metres from your entry point, always face down and always floating rather than swimming. It’s the real technique that matters for non-swimmers: staying in control beats covering distance every time.
Forget kicking to get anywhere. Your vest does the floating; your job is just to look down and breathe. If you want to move, use tiny flutter kicks, more like a gentle paddle than a proper swim stroke, and let your guide or a pool noodle handle any actual towing if you need to cover distance to reach the good coral.
Hand position also differs from what swimmers do. Rather than sculling to stay afloat, keep your arms relaxed at your sides or lightly out to the front, since the vest is doing the buoyancy work you’d otherwise use your arms for. Fighting the water with your arms wastes energy and can tip you off balance.
Breathing rhythm needs to be slower and more deliberate than a confident swimmer’s, since you don’t have the swimming skill to fall back on if you start gulping air. Practise a steady four-count breath before you ever put your face in the water, so it’s already a habit once you’re floating.
Emergency procedures tailored to non-swimmers in snorkelling scenarios
Most snorkelling emergencies for non-swimmers are really panic events, not medical ones, which is good news: they’re manageable if you know the sequence in advance.
The moment you feel your breathing spike or your body tense up, stop kicking entirely and let the vest hold you still. Lift your head clear of the water, or roll onto your back if lifting feels awkward, and take three slow breaths before doing anything else. Most of the alarm passes within those three breaths.
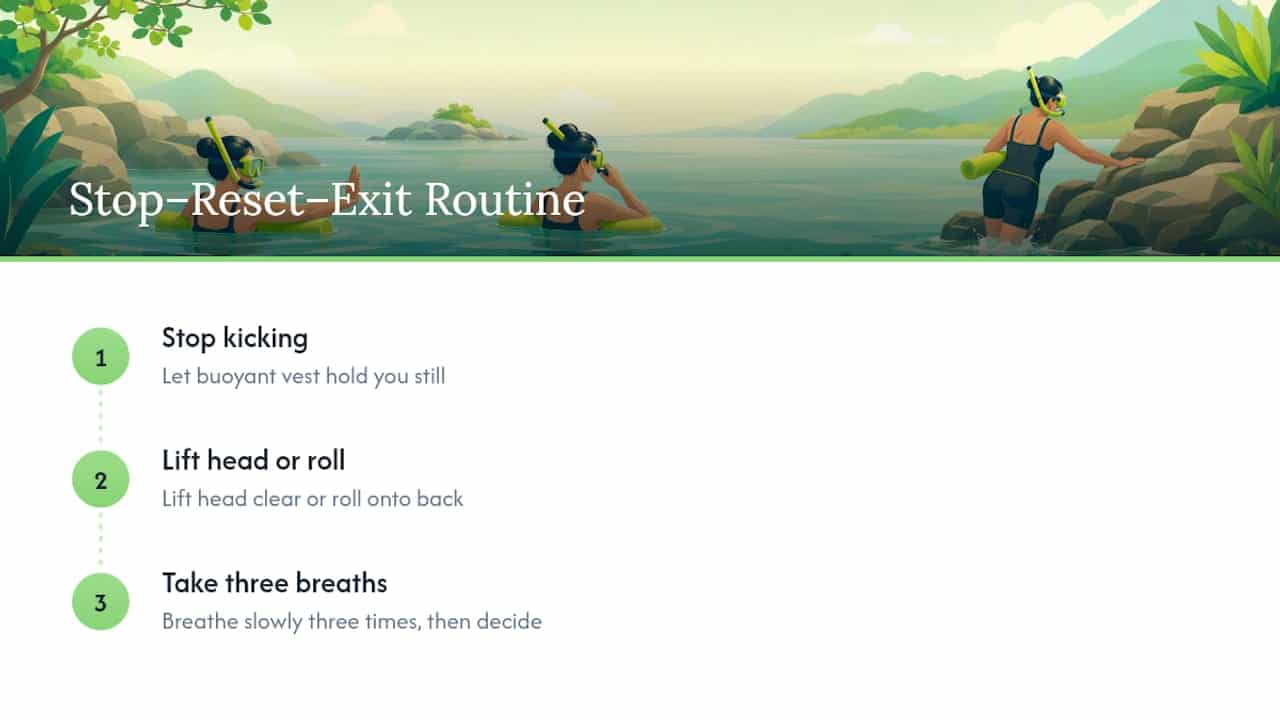
If you’re still uneasy after that, signal your guide with the agreed “help” gesture, a raised arm with a wave, and either stand up if you’re in shallow enough water or let your guide assist you to shore. Never try to swim to shore under panic; a guide or flotation aid moving you is far safer than thrashing.
For genuine medical events, cramp, sudden dizziness, or chest discomfort, the routine is the same first step: stop, float, signal. Cramp usually eases within a minute of stopping movement and stretching the affected muscle gently while floating. Dizziness or chest symptoms need an immediate exit and, depending on severity, medical attention on shore.
Swallowed water causing coughing is common and rarely serious. Roll onto your back, let gravity clear your airway, and breathe through your mouth until the coughing settles before putting the snorkel back in.
The single habit that prevents most emergencies from escalating: never wait until you’re in real distress to signal. Signal early, at the first flicker of unease, and let your guide manage the situation while it’s still small.
What we’d tell a nervous first-timer
The advice that gets skipped most often isn’t about gear, it’s about pacing. Most guides hand you a mask, a five-minute briefing, and point you at the water. That’s backwards for a non-swimmer. The pool and shallow-water drills aren’t optional extras, they’re the actual training, and skipping them is why so many first attempts end in a panicked scramble back to shore within two minutes.
Edge snorkelling gets undersold too. It sounds unambitious, staying where you can stand, moving barely at all, but it’s the entire point. The reef doesn’t care whether you cover fifty metres or five; the fish near the shallows are often just as good.
If there’s one thing worth prioritising above all else, it’s the guide-to-guest ratio, not the equipment brand or the site’s reputation. A close, attentive guide watching your body language will catch a problem long before you consciously register it yourself. Book accordingly, practise the drills properly, and treat the first session as a rehearsal, not a test to pass.
— Carl
Booking a supervised snorkelling trip with a local operator
A practical alternative to figuring this out solo is booking guided boat trips and shore excursions built around small groups, close supervision, and hotel pick-up, so you’re not navigating gear rental, site selection, and safety briefings all on your own before you’ve even reached the water.

A typical Qbic Travel booking includes basic snorkelling gear, a safety briefing before you enter the water, and pacing that suits mixed-ability groups rather than rushing everyone through at the same speed. If Coral Island’s shallow, sheltered bay sounds like the right starting point, our Coral Island tour destination page covers what a day trip there involves, and our boat and cruise options on the Tour & Cruise page often include supervised snorkelling stops alongside other sightseeing. Browse the full range on our Tours page and get in touch via WhatsApp to check dates and confirm a beginner-friendly slot before you travel.
Sources
- Tips snorkeling safely as a non‑swimmer
- Snorkeling for Non‑Swimmers: Stay in control, don’t go far
- Is snorkeling safe for non‑swimmers?


